On this page
Quick Start
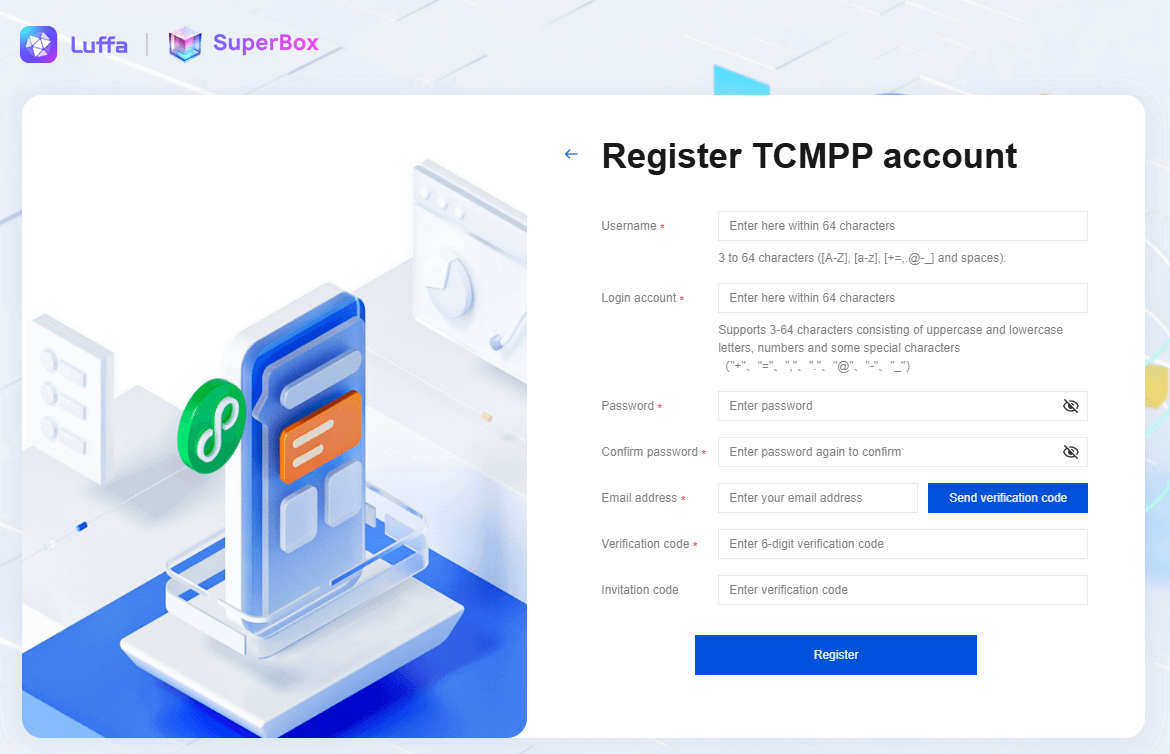
1.Register an account
Register an account →Register Team →
Click the button in the upper right corner to jump to the mini program platform account registration page. 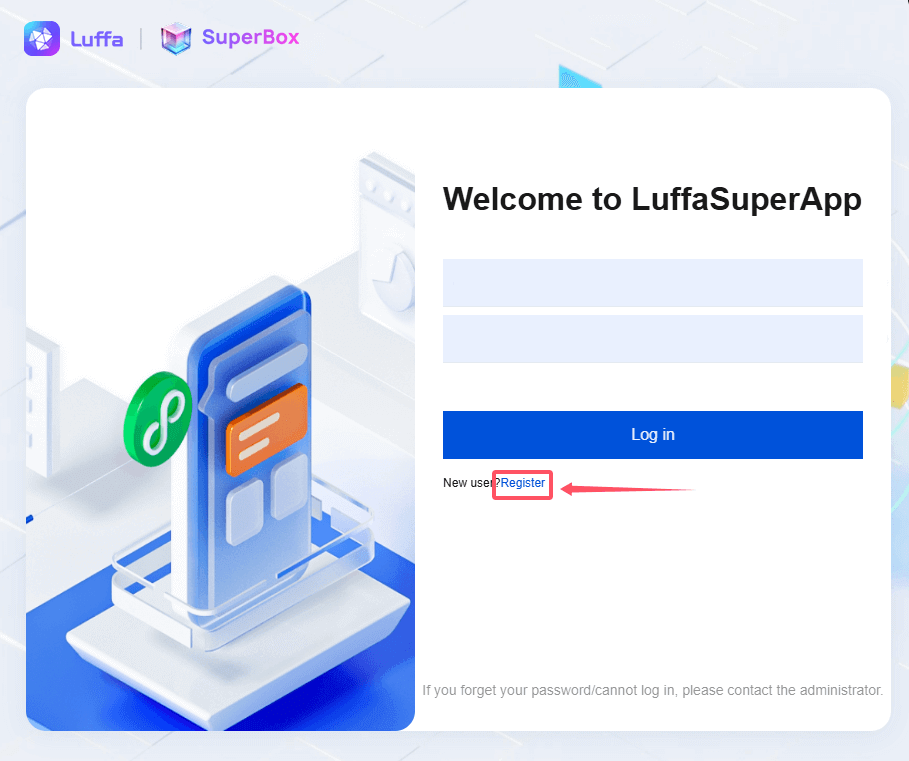
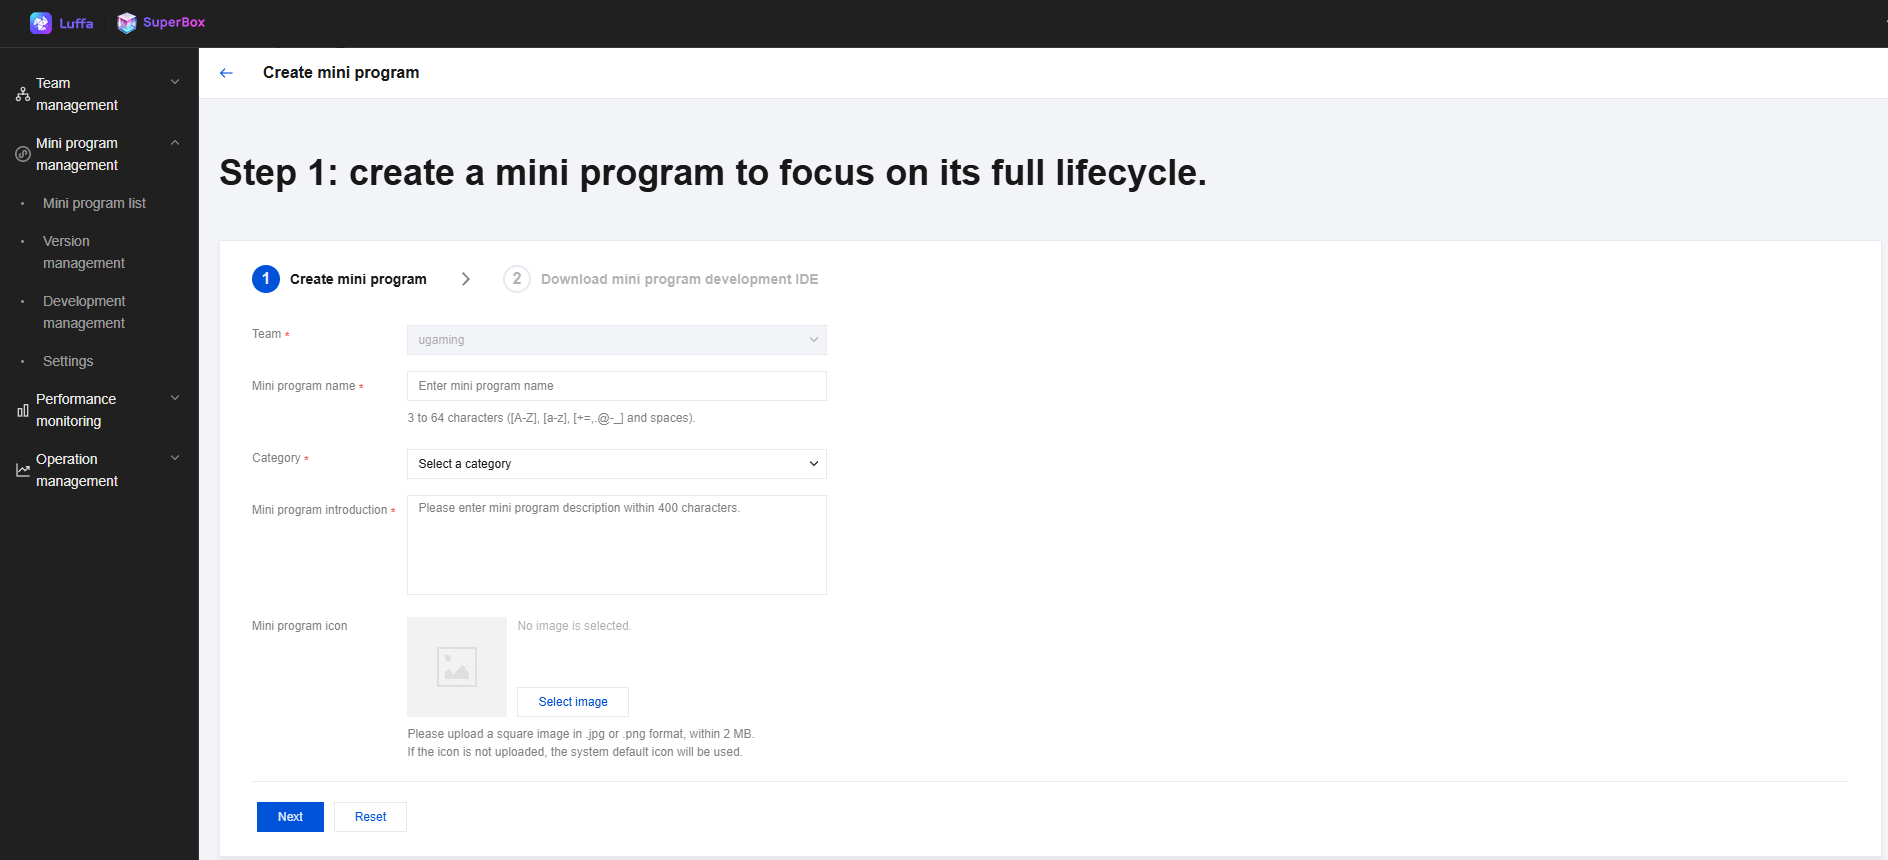
2.Create Applet
1.After logging in with the created account, the mini program team administrator can click Create Mini Program on the mini program home page, and configure the mini program related information on the create mini program page. 
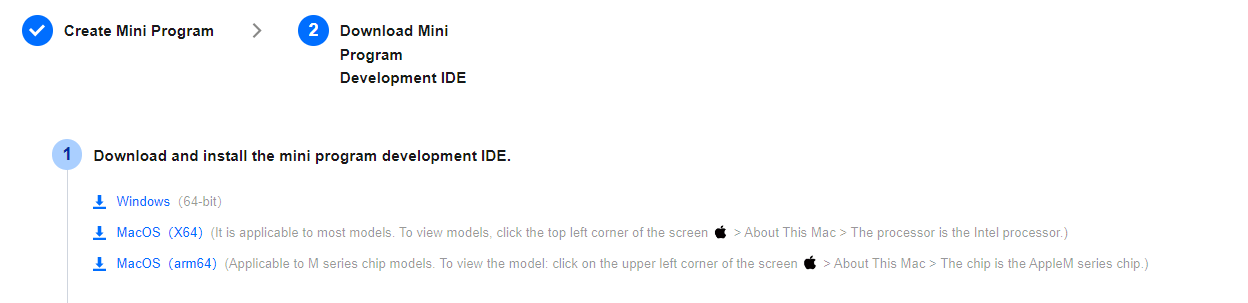
2.After clicking Next, enterprise developers can choose to download the latest IDE version on demand in the console, or click the link below to download.
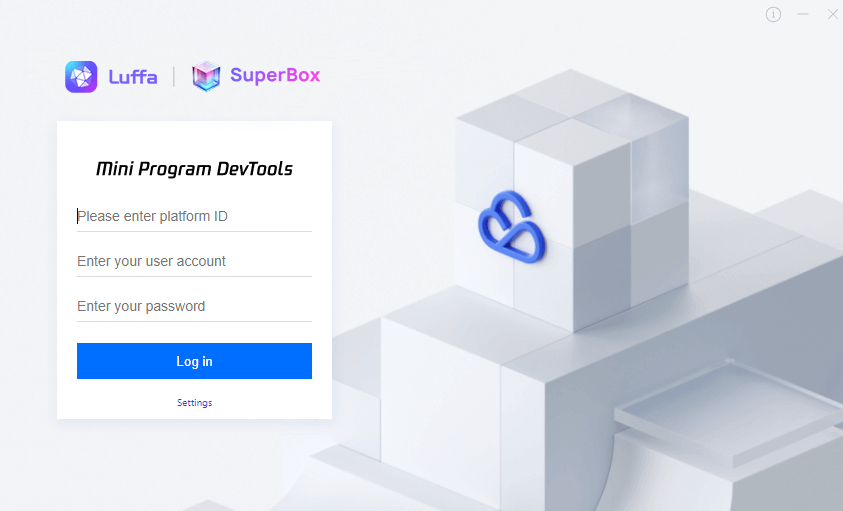
3.After opening the IDE installation file of Luffa Cloud-Devtools_x64.exe locally, click the desktop icon to enter the IDE login page.
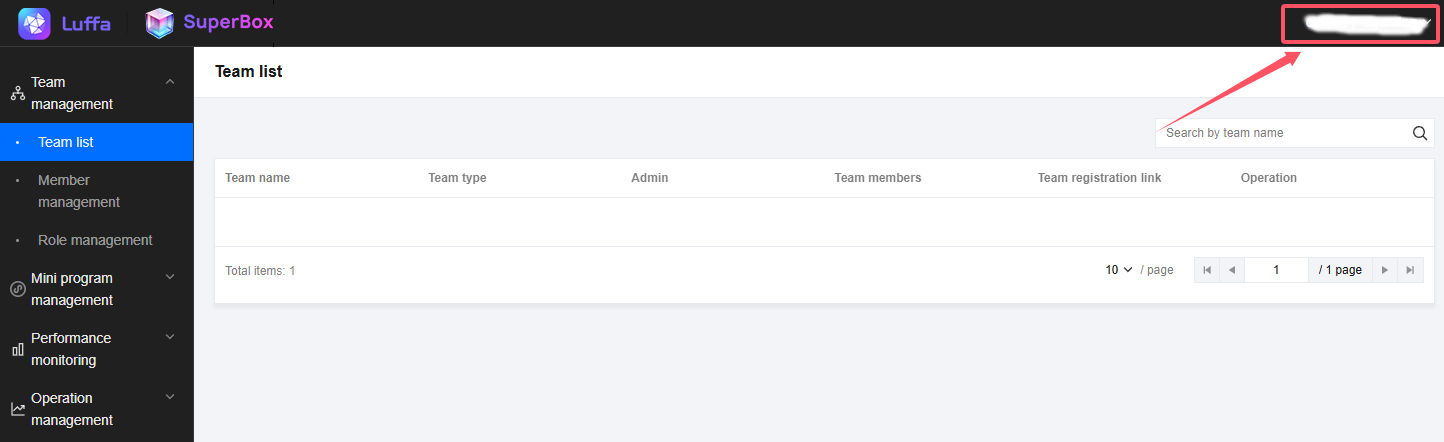
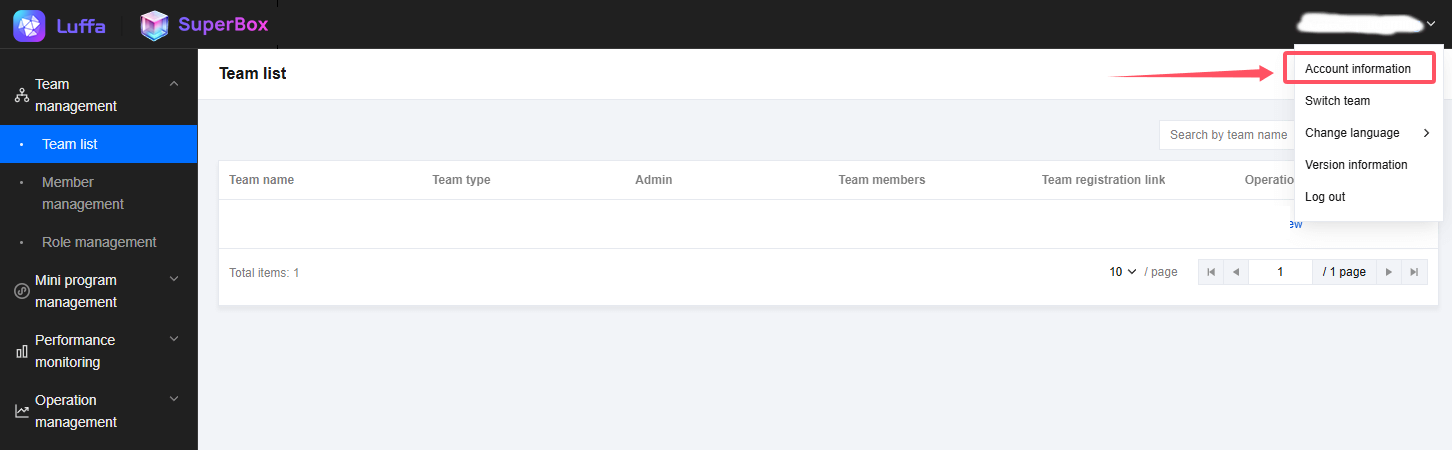
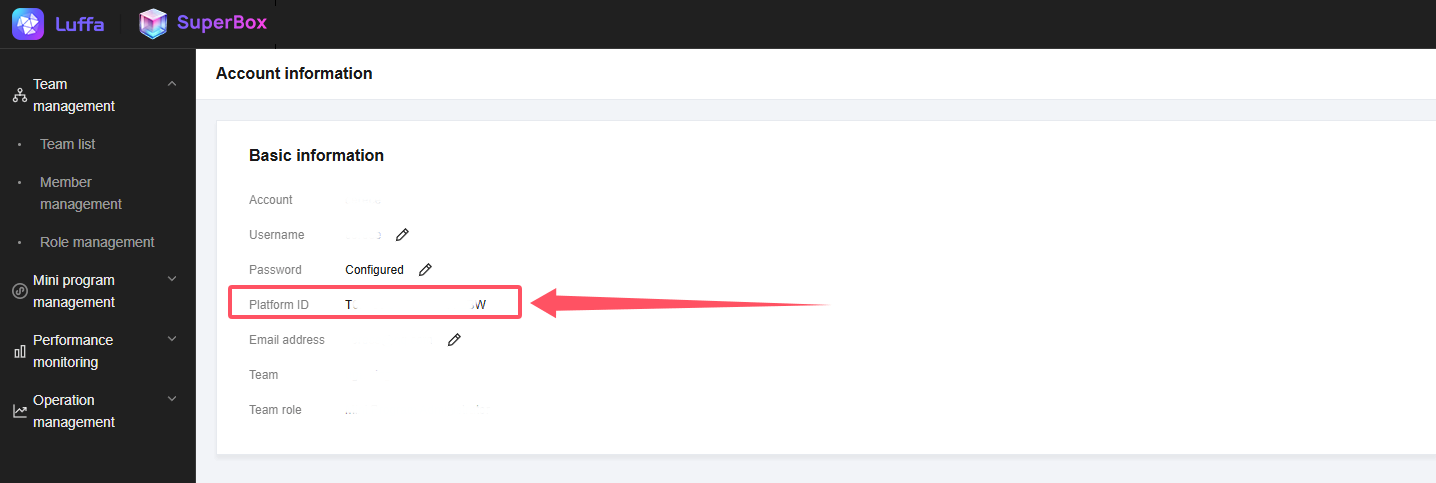
3.How to view the platform ID:
3. Upload Applet
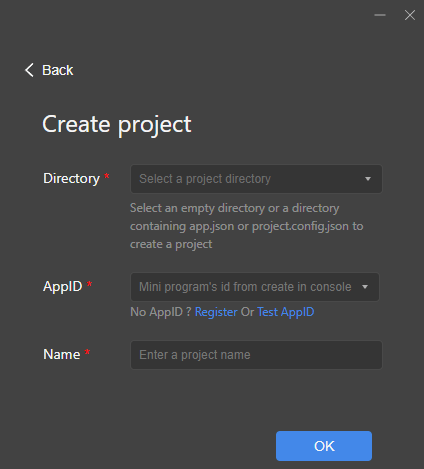
1.After completing the three steps of connecting the application, creating the applet, and binding the applet to the application, the developer can create a new project in the IDE (note that the AppID here is the applet id, and you can pull down to select the one that has been created in the console Mini program, no manual input required).
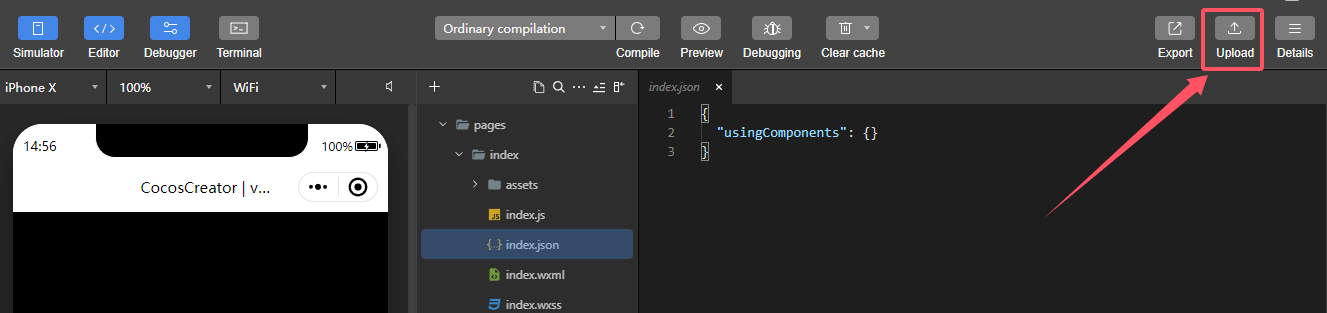
2.After entering the IDE editor, you can directly upload the applet (this step may occasionally fail to upload, in this case you can upload it multiple times and wait patiently).

4. Audit release
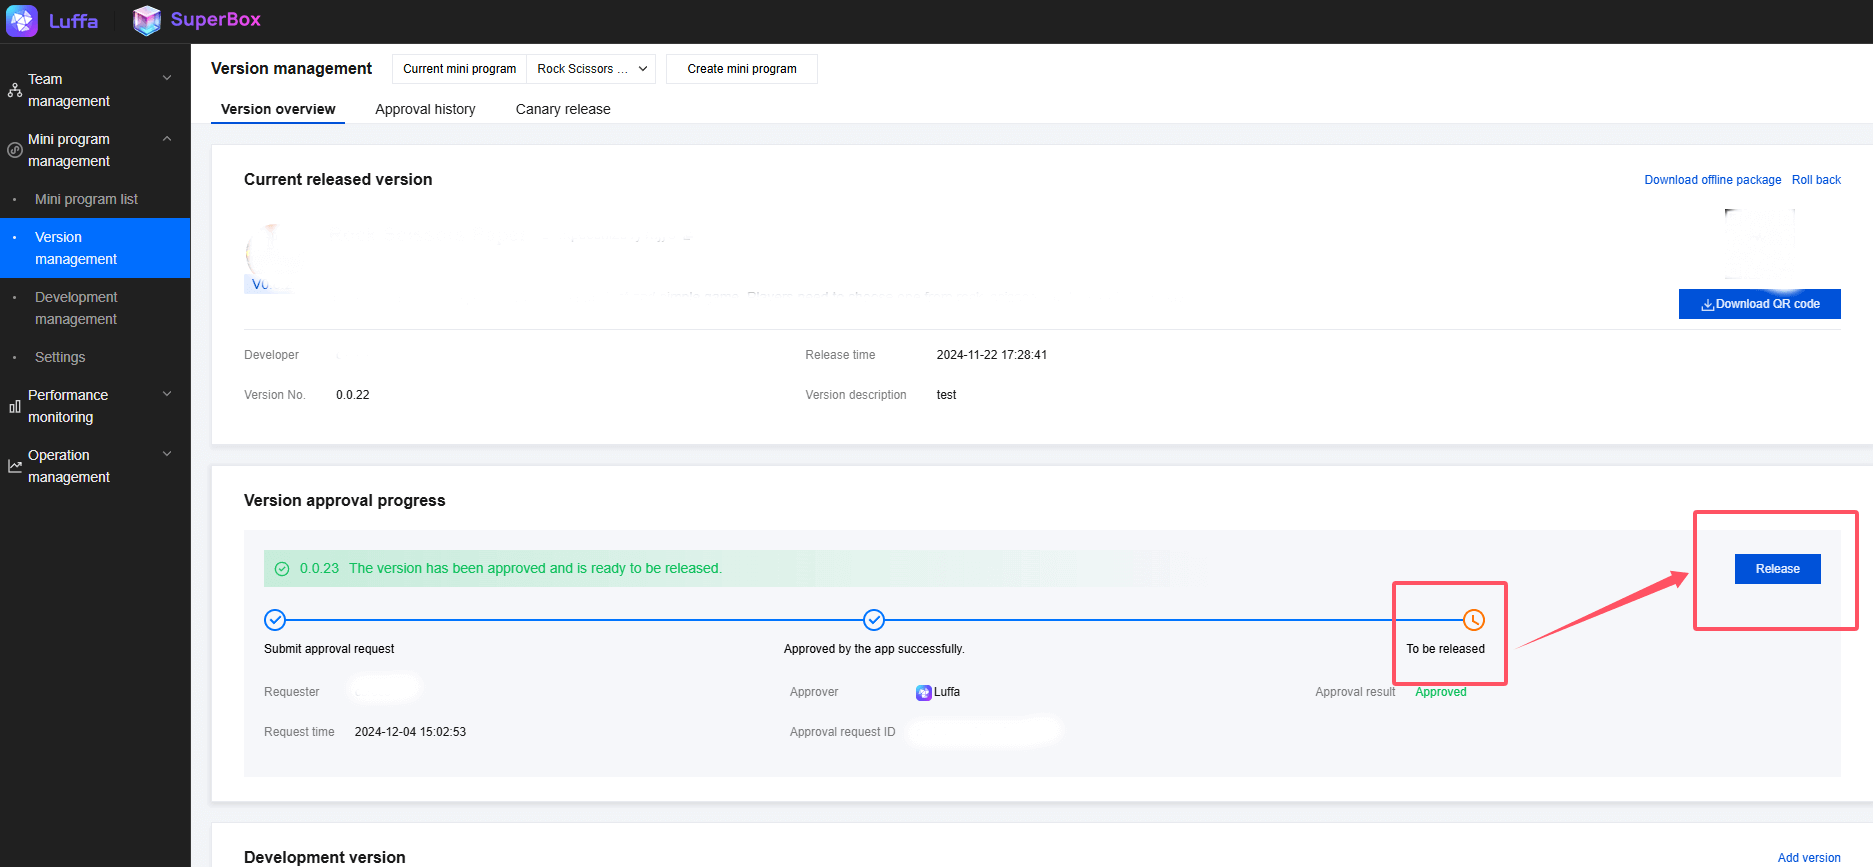
1.After uploading, developers can submit version audits in version management.
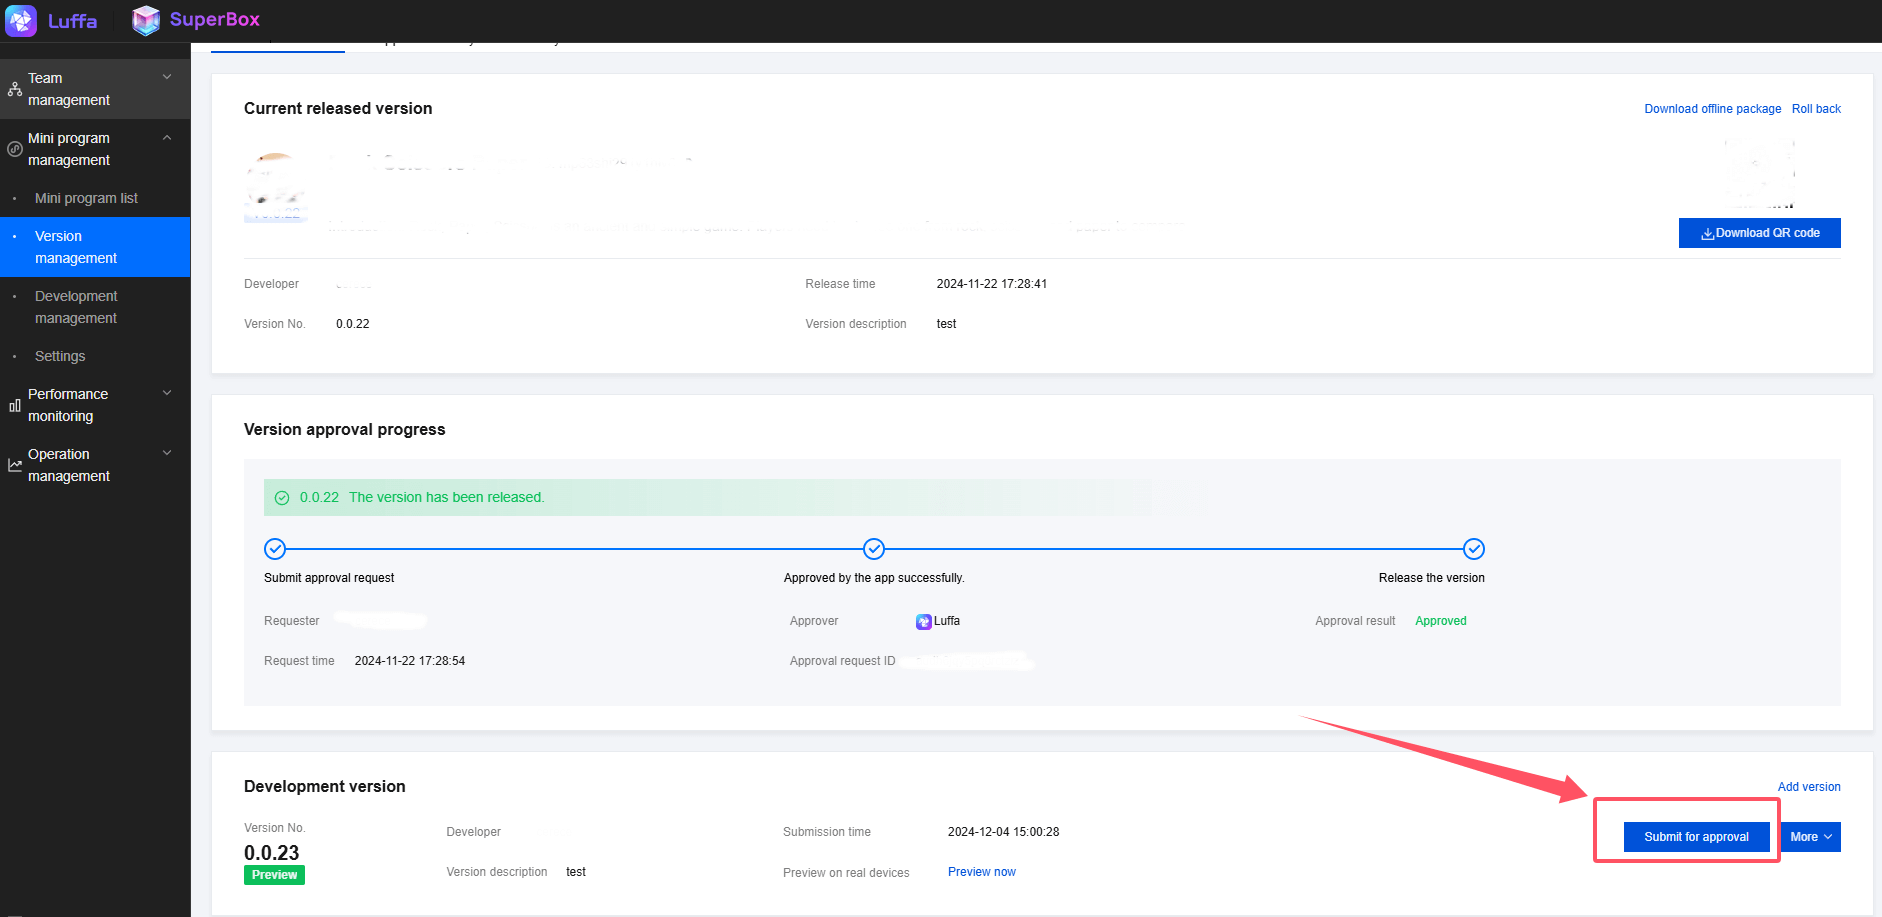
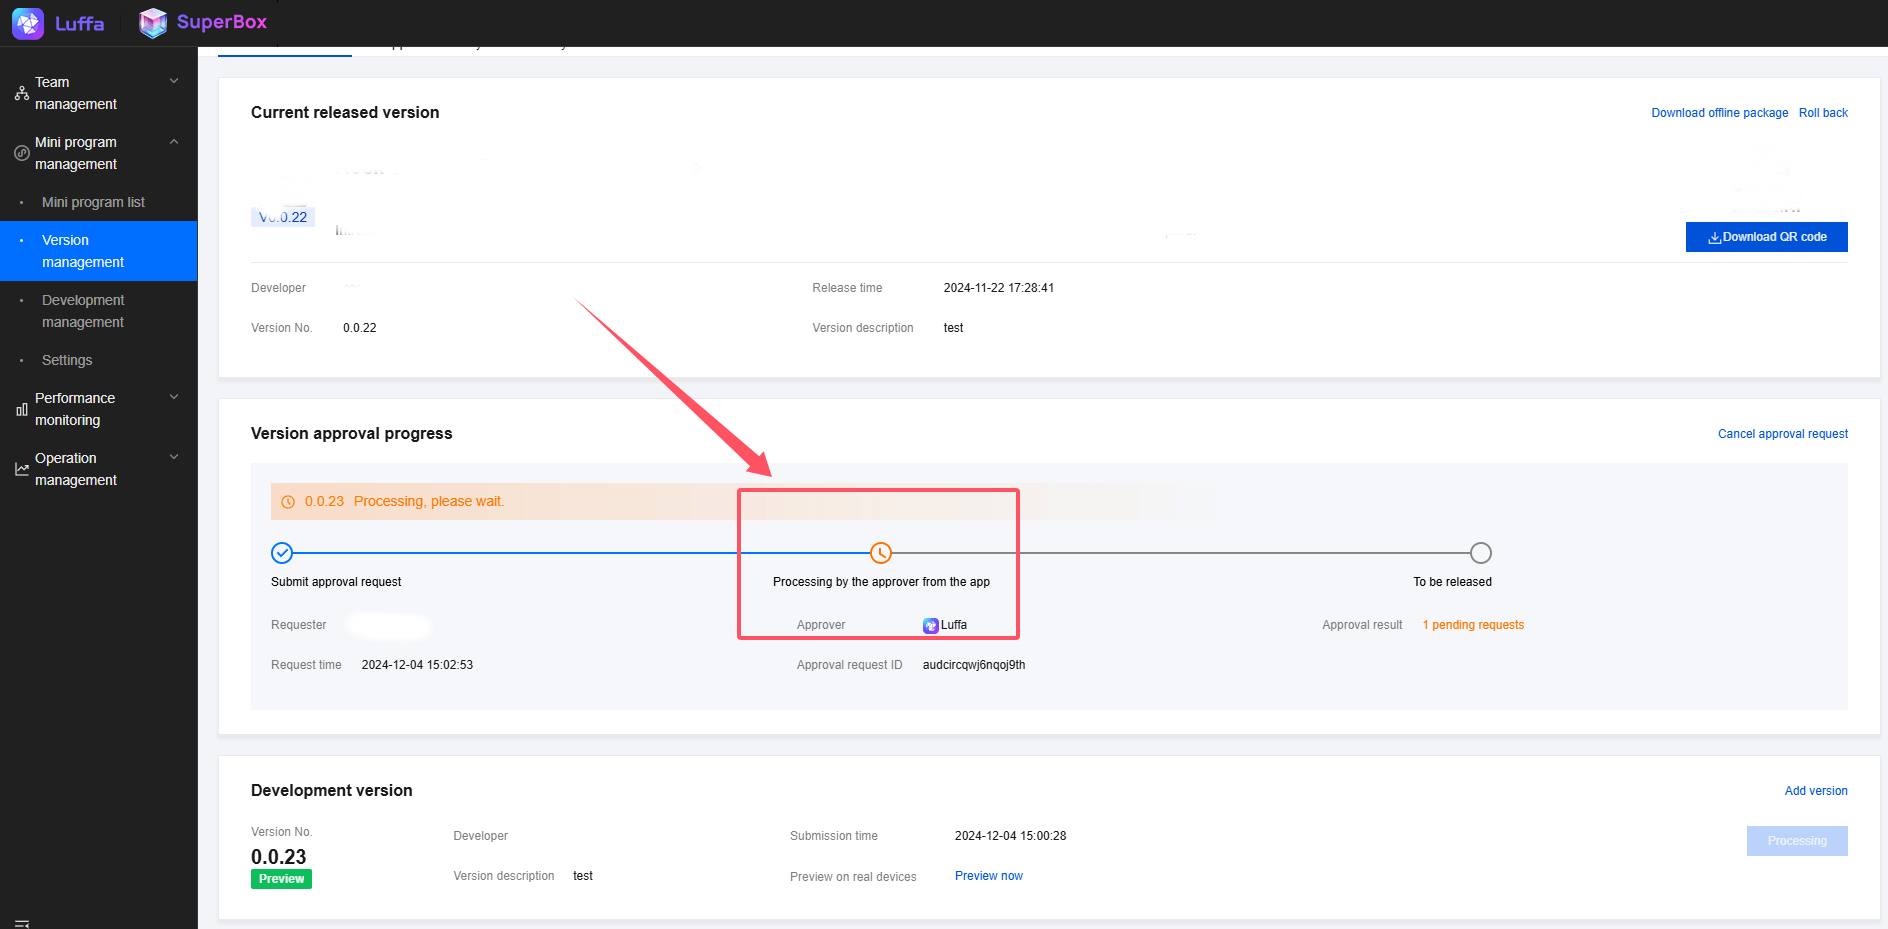
2.After the approval is passed, the version management will prompt that the new version of the mini program can be published online. At this time, people with publishing permission can perform the publishing operation.